


There are very few moments in life as photo-worthy as the birth of your child. These are images you’ll treasure forever, as will your child when he or she grows to adulthood. You, as the person who is not giving birth, are on point for photos because:
You will have the best access to all of the important moments.
Besides Mom, who will be quite preoccupied making the main event actually happen, you have the most interest in having lasting memories of it.
No one else will do this for you – especially as I write this in the midst of a global pandemic, when access to hospital labour and delivery areas is extremely restricted. If your child is to born via cesarean section, typically only one person is allowed into the room for that and it’s unlikely to be a hired photographer.
I was recently blessed by the arrival of my second child, almost sixteen years to the day after my first. Although I’ve been into cameras and taking pictures since a young age, it was the birth of my first son, whose impossible cuteness demanded documentation, that kickstarted a regular practice for me and took my skills from “snapshots” to “photography”.
Thinking back on that first arrival and with fresh experience from this most recent one, I was inspired to share some of my learnings with other expecting dads and birth partners so you can make the best possible images to remember and share this important family milestone.
1. Study Some Photography
In this day of smartphones, Instagram filters and computational photography, it’s has gotten easier to take a usable picture. As a result, the creativity and skill required to make a beautiful image has become somewhat under-appreciated. Regardless of how good the equipment is, your abilities represent the only gap between a snapshot that’s just “OK” and a beautiful image will be treasured, felt and appreciated by all who see it.
I obviously can’t convey all there is to know on the topic here. Photography is an art form, a means of communication, as well as a technical skill. There are some awesome YouTube channels and books that will get you started or help you ratchet your skills up a level.
Here are a few links to get you started:
Tony & Chelsea Northrup Photo Tutorials
Photographing your child’s birth is, in a sense, telling a story – it’s a perfect example of documentary, or “reportage” photography. Pick up a National Geographic magazine to browse some amazing photo essays and note how their photographers convey a story through images. Get inspired by some of the greats like Henri Cartier-Bresson and Robert Doisneau. Also try to find other births that have been nicely photographed; look attentively at those shots and attempt to understand what makes them so good.
2. Choose the Right Camera

I highly recommend the FujiFilm X100-series cameras and a good smartphone for backup.
Starting from the premise that these might very well be the most important photos you’re ever going to take, you’ll want to carefully consider the equipment you’re using. You’ll need more than your smart phone, even if it’s a top-of-the-line model (at least as of this writing, in June 2020). You also don’t want to haul a cartload of pro-level gear into the delivery room with you. The birth of a child presents photographic conditions that fairly specific and there are several factors to consider in handling them optimally. You won’t get very good advice from generic buyers' guides. so please have a look at my comprehensive guide on selecting the right camera to photograph your child’s birth.
Also make a point of learning the ins and outs of your photo gear. The camera’s owner’s manual is comprehensive but tends to be pretty dry and more for reference, so it’s worth picking up a third-party book or watching some videos that are specific to the setup and use of your chosen equipment.
3. Practice, Practice, Practice
None of what you read or watch about photography will actually stick unless you practice it. That, and you need to learn your camera so that operating it is second nature. Even if you’re already a petty decent photographer, you don’t want to be learning the feel and control layout of a new camera as you’re trying to capture some the most important moments of your life.
Assuming you don’t already have your camera, I’d suggest you acquire it as soon as your partner’s pregnancy starts the second trimester, if not sooner. Then, immediately start a daily practice that involves bringing your camera to as many places as you can and take at least a dozen pictures a day. Think of the lighting and space conditions that you’re likely to encounter during the delivery process and seek out similar conditions. (Dimmed lights and drawn curtains are typical during labour. Very bright procedure lights in an otherwise clinically-lit room are what you’ll find in an operating room. Odds are you’ll be indoors. Etc.) If this pandemic ever ends, bringing your camera to social events and get-togethers at the home of family and friends is great practice.
Review Your Practice Photos
Don’t just leave the photos on the camera. Download them to your computer and review your photos critically, at full size. How are you at getting your intended subject in focus? How is your exposure (too bright/ dark/just right?) How are your compositions? What can you differently to improve? If you have a friend or family member who is good at photography, ask them to critique your photos and to offer constructive feedback. Many online forums offer this too; your mileage may vary.
Then, take what you’ve learned and go out the next day to try and apply it. Repeat daily.
Over time, you will level up your skill and improve your brain-camera interface to the point where you don’t have to think about the camera itself - only the image you are creating. Early on you will also have time to try different camera setups so you can settle on the configuration that works best for you.
For an example of the various camera setups, I tend to shoot in single shot drive mode, aperture priority (a.k.a. manual aperture, auto shutter speed), auto-iso, and manual focus mode with single-point autofocusing assigned to a rear-mounted button that falls most easily to thumb. For fast action, I sometimes switch to continuous drive with continuous face-detect autofocus so these are pre-set so I don’t need to go hunting in camera menus.
4. Prepare Your Gear
Besides finding and setting up your preferred camera settings, you’ll need to achieve a state of constant equipment readiness as your baby’s due date approaches.
Camera Settings: Raw Format
One camera setting that is critically important is the image format: you must shoot “raw”, not JPEG. Keep the camera set to raw in the days leading up to your child’s birth.
Raw vs. JPEG can be a topic of debate in general photography circles but for this particular use case, the larger raw files will capture your sensor’s full resolution and dynamic range so you will have much greater latitude in processing/correcting any less-than-perfect photos after the fact. Again, these are some of the most important photos you’ll ever take so don’t mess around: use this additional bit of insurance. The drawbacks of raw, in my experience, are few: they require more storage, but memory cards are huge and relatively cheap nowadays, so that’s easily countered. They can also limit your camera’s high-speed burst capacity because they fill up the camera’s buffer and take more time to write to the memory card. This is more of a concern for shooting sports and extended action scenes. Although things will seem to happen in a blur, your camera’s raw buffer and capture speed are likely to be more than adequate for your child’s birth.
Other Camera Settings

I prefer cameras that have physical dials for their various settings. Besides being super fast to find and use they let you see your camera’s main settings without having to power it on.
While it’s OK to experiment with various camera settings while you are practicing, your camera should be set to your preferred, most-likely-to-use, modes, settings, etc. every time you power it down to put it away. I can’t begin to count all the times I have messed up spontaneous photo opportunities because my camera had been stored in some edge-case mode and I either didn’t realize the settings weren’t right, or I wasted critical seconds restoring my “go-to” settings.
Important: these “go-to” settings are not intended to be universal camera settings for every shooting situation. You should adjust your settings according to the scene and your creative preferences for any given shot. These are just the settings that will let you take a photo fast, right out of the bag, or at least have less fiddling to do before you can snap a shot.
My go-to settings aren’t necessarily the right ones for everyone, but for what it’s worth, here is how my camera goes into the bag:
Single shot drive mode
Manual + rear button autofocus (beginners might prefer standard half-press on shutter release autofocus)
Focus point centered in the frame
Exposure compensation set to zero
Auto shutter speed
Auto ISO (ISO is sensor sensitivity to light. You want this as low as possible while getting the desired exposure. Auto ISO will increase your ISO setting when your shutter speed drops below a desired threshold. Mine is set to 1/60 sec for a 23mm APS-C lens)
Manual aperture set to F5.6 (Note that auto aperture / may be better if you’re less experienced. I just try to force myself to think about aperture every time I take a photo. F5.6 is sort of a large-medium setting and tends to produce good sharpness, and it’s not as demanding of perfect focusing as F2 or lower so that’s why it’s my default.)
Other Items to Keep at the Ready
A “constant state of readiness” also means that your camera goes into its bag with a freshly-formatted memory card and a full battery whenever you finish with it for the day. It further means that the right lens is attached to the camera body and that you’ve blown all the dust off the optics and there are no specks on your sensor. This camera bag is stored every night in or near your hospital go-bag if you have one. I highly recommend a minimal setup and a small bag filled as described in my guide to choosing the right camera for documenting the arrival of your baby.
5. Your Smartphone is Your Backup

I have made an effort to emphasize that your smartphone should not be your main camera for your child’s birth, but it still has a role, so do acquire the latest and greatest smartphone you can afford and have it set up as you like it well in advance of the due date. Practice taking lots of photos with this device, too. Here’s why:
You should have it at all times for communication with family and friends anyway.
It will perform acceptably as a backup camera in case something terrible happens to your main camera (forgotten, malfunction, damage, etc.)
Unless you’ve really developed your videography skills, the smartphone may be your best option for getting video footage between still photos because most newer ones have great image stabilization and can shoot in 4K. Most importantly, not all good stills cameras can easily switch to video modes without messing around with various settings you’ll want to change back before taking pictures again. (But for god’s sake, hold your phone in landscape orientation, a.k.a. sideways, when shooting video unless you only intend to post the video to Instagram!)
Your main camera may be too much for a novice to figure out so the smartphone will be the best option if someone offers to take a photo that includes you. (Definitely take them up on this!)
Your smartphone provides a good way to back up the photos you took with your main camera.
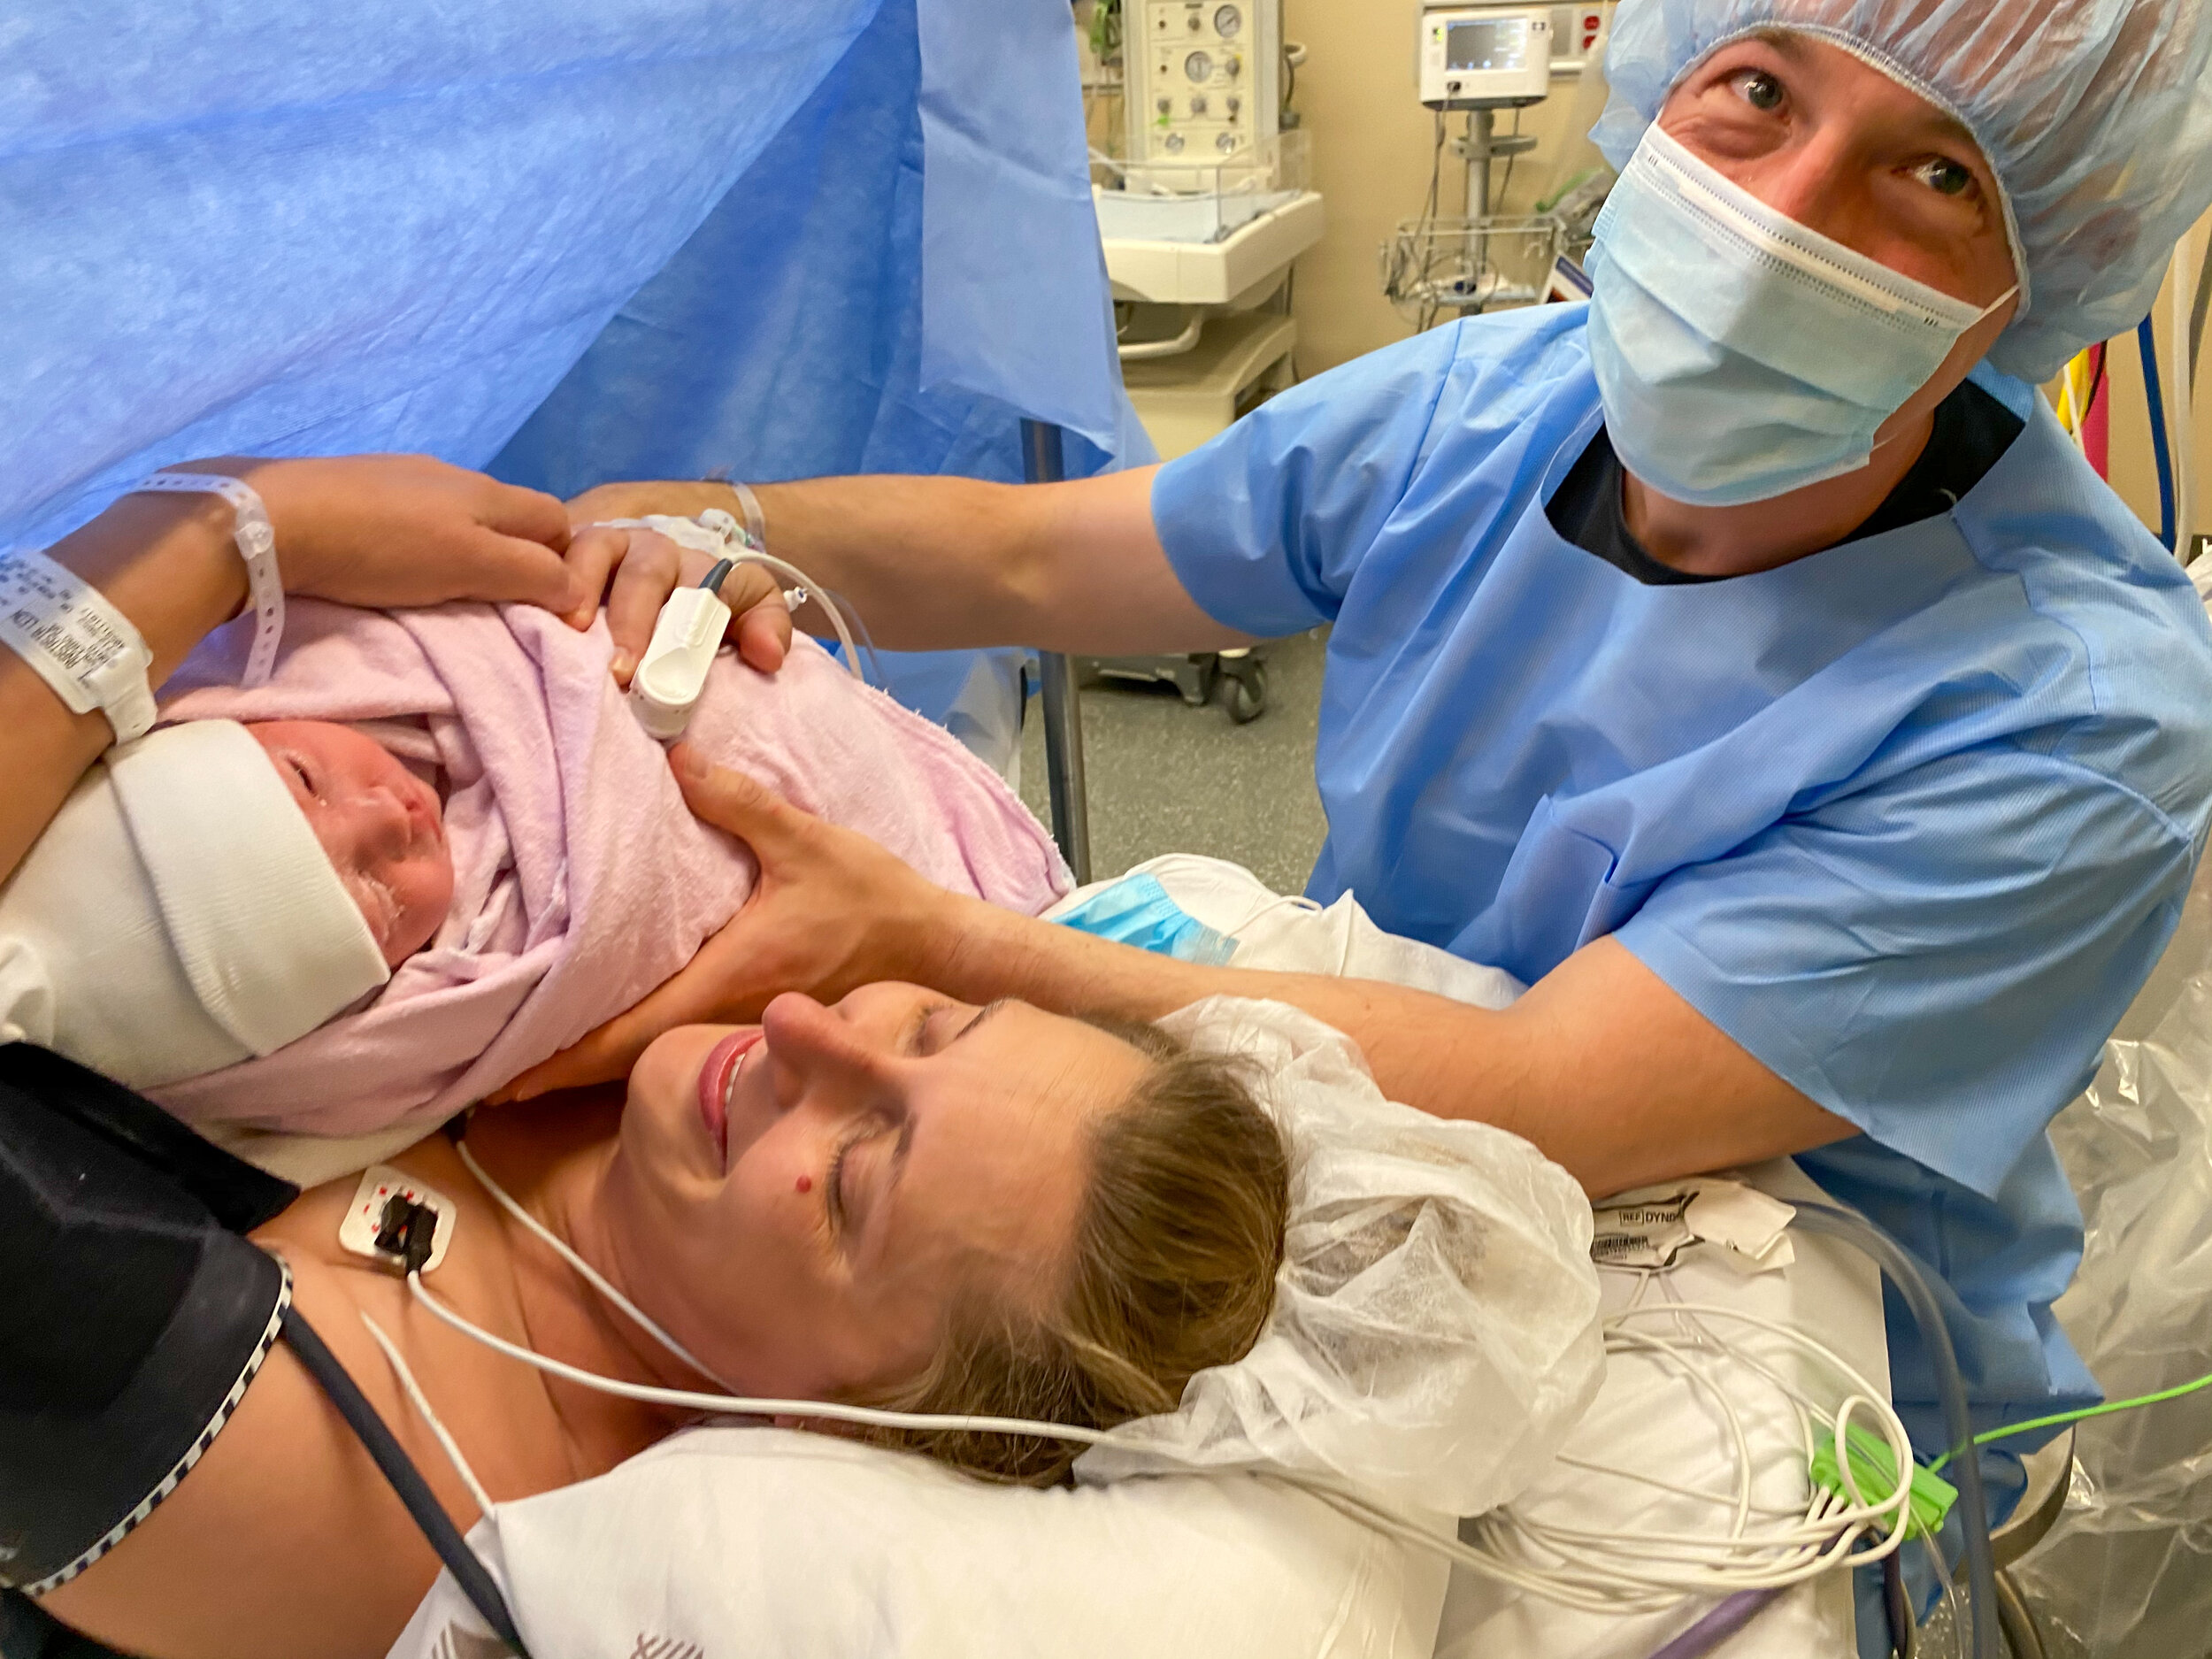
Our anesthesiologist kindly offered to take some pictures using my phone so I could be in them but also allowing me to just enjoy the moment.
So for all of the above reasons, keep your phone charged and make sure your go-bag or camera bag includes a wall charger and a power pack to be safe.
6. Discuss Photos with the Mom-to-be In Advance
I probably don’t need to go into all the reasons for which you’d want your partner to be a part of your advance planning process. After all, she’ll be in many of the photos and she’s also your principal “client”, besides yourself, for this photo shoot. What follow are some topics to discuss and agree upon before your child arrives.
Keep in mind that what you photograph and what you share are not necessarily the same thing. Start with discussing the full set of images that are private for just for you and Mom. You must then solemnly swear that she has full veto power over the retention and sharing of any images and that you won’t start blasting the photos to everyone until after she has reviewed the images.
Does she want photos taken while she’s in labour, or undergoing various medical interventions? I don’t want to be the one to break it to you, but your beautiful lady probably won’t be looking her Instagram-best during many stages of the process.
Are there particular events / items / people surrounding the birth that you both want to remember?
Where does she draw the line on what should and shouldn’t be photographed? There will be some intimate, medically graphic and even painful scenes happening before your eyes. You’ll need to exercise discretion and sensitivity before pointing your lens at them.
During the discussion, also remember that your child will one day grow up and also have an opinion about the photos captured of him or her. Of course, it’s still up to you and Mom how much is shared but it’s something to keep in mind as you decide what to photograph.
One more tip about this: try to prove yourself both as a skilled photographer and someone whose discretion can be trusted well in advance of this conversation and you will have more photographic options as a result.
7. Don’t Forget Your Job
Let’s be very clear: your primary job is not “birth photographer”. (If I wasn’t trying to explain this sequentially, this item would be number one on the list.)
First of all, you are there to be a husband/partner to Mom and to be a father/caregiver for your new little one.
You are there to support your partner emotionally, mentally and often physically. You are there to advocate for her with the medical staff, and to help with important decisions as the situation evolves. You are there to greet the arrival of your beautiful new baby, and to welcome her or him with as much love as you can muster.
Don’t lose yourself behind the camera; keep paying attention to what's happening around you. You will need to put the camera down a lot so accept now that some of the moments won’t be documented– not by you, anyway.
It’s OK. by putting the camera down, you’re not just being present for your family: you are letting yourself enjoy the pure euphoria of seeing and holding your baby for the first time.
Credit: Our Anesthesiologist
Holding the Camera While You Do Your Job
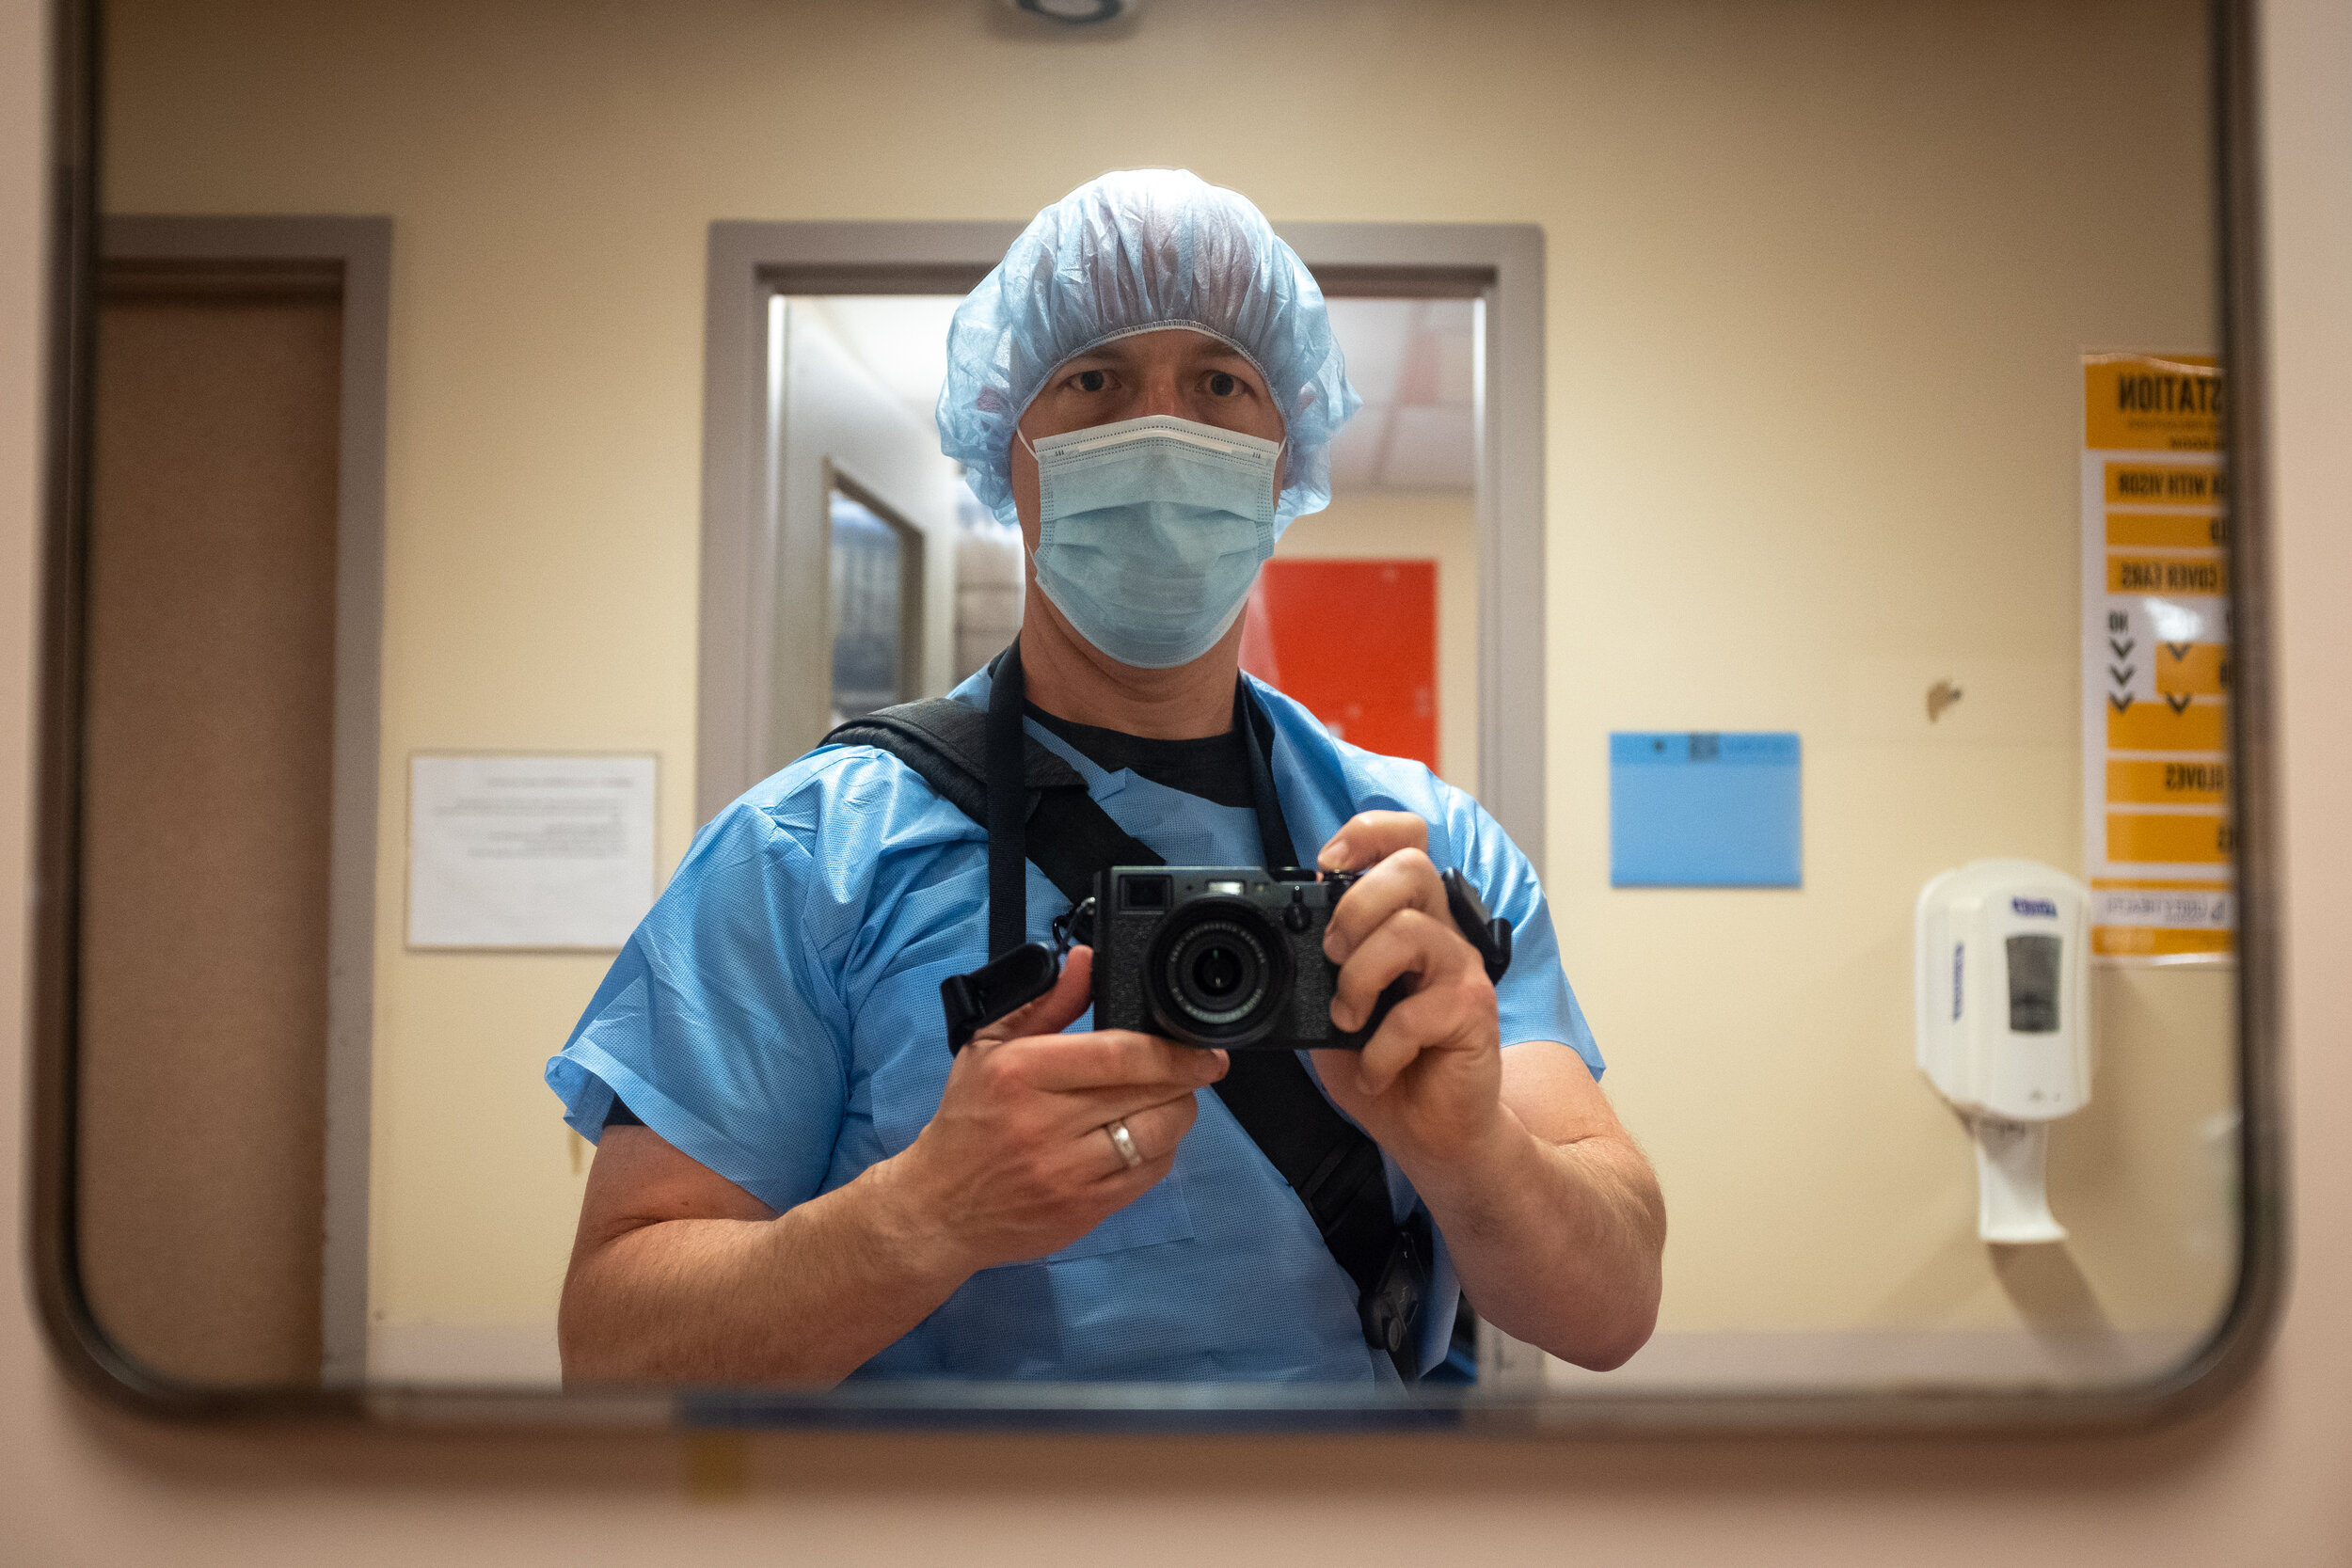
In practical terms, all of this means you’ll want your camera on a neck strap, as opposed to a wrist lanyard. I normally shoot with only a wrist lanyard when I’m out and about but this occupies one of my hands unless I’m storing the camera in a bag. For this big event, you want to minimize the amount of stuff with you in the delivery or operating room but you want to keep the camera ready even if you have let go of it completely – without fiddling with a bag’s flap, Velcro or zipper. Hence, a neck strap.
Immediately following the delivery, you’ll want to hold your baby so I’d highly recommend purchasing an extra long neck strap that allows you to hang the camera across your body from one shoulder so it sits near one hip, instead of hanging it around your neck, causing it to end up on your chest. (I like the Peak Design system, myself.) The other advantage of the longer strap is you’ll be able to maneuver the camera into more vantage points when needed.
The Peak Design Capture clip is also great for holding your camera at the ready- it’s another of the accessories I use a lot under normal circumstances . However, if you have to wear scrubs over your clothes for the delivery, you won’t have easy access to a belt that’s sturdy enough to secure it.
8. Tell Your Story
The photos you take will be able to tell those who see them, as well as years later reminding you, of all of the events leading up to and following the arrival of your child. Despite the business of being born having become a somewhat standardized thing, your family’s story will be unique, as will be the way you tell it through photography.
Here are some things to think about to make your story compelling and as vivid of your experience of it:
Do your photos provide geographic context? Do you have shots identifying the hospital, the clinic, your home?
Do your photos provide some historical context? What is happening in the world, your city, your neighbourhood around the time your baby is born?
Labour in during the COVID-19 pandemic of 2020: masks for everyone.
Births happen in a lot of different ways. Labour can be at home, at a hospital, walking around, in a tub, etc. Births can be in a hospital delivery room, at home, in an OR. Do your shots capture somehow the steps that happen along the way to your child’s arrival?
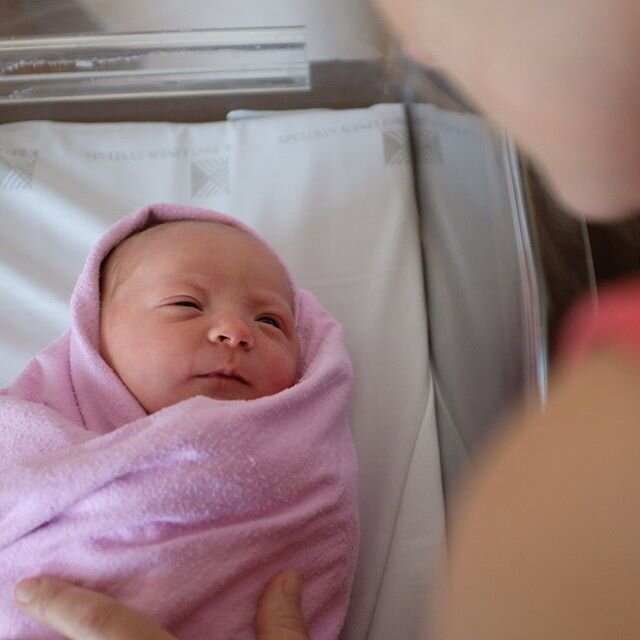
Mom seeing daughter for the first time.
Details matter. You don’t have to always be photographing an entire scene. You can get close up to photograph little things that will trigger more detailed memories.
Fetal heart rate and contraction monitoring charts.
Document your own experience, too. What is it like to be you during this time? It can be hard on moms but it’s not always a picnic for dads, either.
My bed and pandemic mask.
9. Technical Tips
When you’re actually taking pictures, there are a few technical topics that also qualify as standard photographic pointers, but that you can fine-tune for the situation. Here are a few that come to mind for me.
Control your Aperture

Most FujiFilm X-Series cameras have the aperture control on the lens itself.
Depending on the scene, you may have a lot of visual clutter from medical equipment or other people in the background or foreground. These can distract from your main subject, so use your aperture setting to selectively blur out the noise. In very low light, you won’t have much choice but to use a large aperture to prevent excessively low shutter speeds.
Babies are soft, so aesthetically I like to photograph them with a shallow depth of field (large aperture) with the focus point on the eyes. The DoF gets shallower the closer you get to your subject.
The main times you’ll want to go with a smaller aperture / higher F-stop / deeper DoF are when you have good light and subjects at varying distances from your camera, like when Mom is holding Baby or when something important for context is happening in the background. Sometimes your background is aesthetically clean and simple, or it supports your composition, so if you’ve got good light, you can stop it down a bit. Most lenses produce their sharpest images in the middle of their aperture range and you won’t be penalized as heavily if your focus point isn’t perfect.
Just remember that every exposure setting, including aperture, has tradeoffs. Smaller aperture gives you more DoF but less light on the sensor so your camera will have to compensate with slower shutter speed or higher ISO.
Speaking from my own recent experience, the majority of my indoor shots were at or around the largest setting on my lenses, that being F2.
Control your Focus

For this photo, I used the joystick in the upper-right corner to move the focus point onto the part of the image I wanted to have in focus.
By this I don’t mean use manual focus (unless you’re really practiced at this). Rather, you should be deliberate about what you allow the camera’s autofocus to focus on. The autofocus is often faster and more precise than you can be, given sufficient light and contrast but remember: you’re its boss.
Left to its own devices, my camera probably would have focused on the IV pump in the foreground.
At large apertures / shallow DoF, accurate focus is critical because any error will be exaggerated. (There’s no such thing as an “enhance” tool to find detail in the blur after the fact, like they do in the movies. ) When photographing a person’s face, always focus on an eye, preferably the nearer one, because that’s what people are naturally drawn to when viewing your photo.
Autofocus and face / eye detection are getting quite good in the latest cameras but I don’t fully trust the camera’s computer to pick my subject for me yet. Maybe I’m a bit of a control freak. As a result, I tend to use my cameras in manual focus mode with rear button autofocus, which means that the camera won’t attempt to focus when I press the shutter button. Rather, it assists me with focusing only when I press the button on the back of the camera to which I have assigned the focus function. And then, it only focuses on a single point. My viewfinder’s focus point is set rather small for better precision. My cameras have a rear joystick I can use to move the focus point to different areas of the scene, or I can focus on an item and recompose. The latter is OK for more distant subjects and greater DoF but when very close up at big apertures, I use the joystick to avoid changing the subject-camera distance (and thus the focus) when I recompose.
Expose for Highlights
In a nutshell, you can more easily recover an underexposed image than an overexposed image after you get it onto your computer or mobile device. I am a big fan of enabling the histogram in my camera’s viewfinder so I can see exactly how the autoexposure is handling highlights and shadows.

This is the histogram that you can enable on most modern digital cameras to help you get the correct exposure.
If I see the little graph is peaking all the way to the right, that means there are blown highlights in the image that I won’t be able to recover in post-processing. Unless I intend for this to happen, which is not often the case, I will address this by twisting the exposure compensation dial into the negative numbers. Another thing I can do is to point my camera more directly at the brightest area of the composition to force the autoexposure program to reduce exposure, then I half press the shutter button to lock that exposure and recompose. The goal is to ensure the bars at both ends of the histogram (especially the rightmost bars, which represent highlights) are not maxed out while keeping the rest of the bars widely distributed through the middle of the chart.
The procedure lights were very focused and a lot brighter than the rest of the scene. The highlights on my daughter’s head got a bit blown here because I wasn’t really looking at the histogram and just let the camera handle the exposure. (I’m still very happy with this photo, though!)
Avoid Using the Flash

To show that I learned photography by making mistakes, here is a photo I took of my son on his first day, 16 years ago, with a flash.

I tried again without the flash and obtained a much better result, despite it being out of focus and a bit blurry. That was my lack of skill and poor choice of camera to bring.
You definitely don’t want to be firing off a high-intensity light source at your newborn’s brand-new retinas. So make sure your camera’s flash is not set to Auto and that you’re not using a full-auto program mode that will “helpfully” pop up a flash for you. Keep the flash off the camera entirely if it’s not built-in.
In my opinion, most photos taken with automatic flash look terrible and they are generally unpleasant for your subjects, not to mention too conspicuous for taking unaffected, candid photos.
Since I’m expressing opinions, I believe there are actually very few conditions where a flash does not completely ruin your photo with its unnatural, straight-on light. Here are the conditions in which I would attach / turn on a flash.
If there are absolutely no other options to get a blur- and noise-free picture, e.g. if your camera wants to go to ISO 6400 with a shutter speed slower than 1/30 sec and you can’t bring in a different light source. In such cases, larger external accessory flashes can be bounced off the ceiling and/or diffused to mitigate the unnatural look you’ll get when it fires.
If your subject is brightly backlit and you need to to see the detail that’s consequently in shadows. Depending on how bright the backlight is, you shouldn’t have to use the flash’s full power so dial it back if possible. (But I still don’t think you should use it if the subject is your baby.)
If you’re purposely trying to achieve a “flashbulbs in the face” papparazzi aesthetic for your photos. (Again, not for your baby!)
Make Your Camera Stealthy
Your best shots will probably be the candid ones and you don’t want people to get annoyed or uneasy about all photos you’re taking, Also: you don’t want wake your sleeping little one with camera lights and noises!
So along with turning that flash off, make sure to disable any autofocus beep or fake shutter sounds. I recommend a camera that has a leaf-type shutter or at least an electronic shutter capability so you can snap photos silently.
By default, a lot of cameras will light up a bright LED “autofocus assist light” in dark conditions. This light can be pretty bright and conspicuous, so turn this feature off and revert to full manual focus when it’s too dark for the autofocus to work.
Make Backups
It would be awful to lose any of your irreplaceable photos due to camera loss, memory card corruption or other mishaps. After you’ve taken photos, at your earliest opportunity, connect your camera to your computer, tablet or smartphone to import your raw photos if possible (JPEG copies of them if not). There are many ways to do this including:
direct USB connection from camera to computer
SD card reader attached to your computer or mobile device
Bluetooth or wifi connection between the camera and your device
Then make sure those images get saved to the cloud via whatever internet connection you can get. Depending on your location and internet speed, this may be an overnight thing. Your mobile device will probably need to be plugged in to sync (lest battery-saving measures shut that process down).
Curate with Mom
There will finally come a moment when everyone is sufficiently recovered, the baby is sleeping and you can view your images on a larger screen. Before you do any photo correction / post-processing work, take a first cut at selecting your favourite shots and put them into a collection or album to then review with your partner. The two of you can then curate the list further to the absolute best pictures. You can also make decisions about which photos you’ll share vs. which photos you’ll just keep for yourselves. I’d suggest creating a duplicate of your “complete” album and from the duplicate remove the private shots.
If any of your “keepers” include shots wth blood in them, remember that some people can get squeamish about that. One technique you can consider to lessen the impact of the photos with visible blood would be to make them black and white. In any case, you know your audience best so use your best judgment.
Share and Enjoy
If you’ve read this far and followed at least some of these tips, you should have some pretty good pictures to share with friends, post to your socials or to enjoy yourselves for years to come. You may even want to print a photo book or frame your favourite shots to hang on the wall.
I hope this has been a useful guide for dads-to-be or anyone who will be privileged to attend the birth of a child and trusted to document the event. I would love to get your feedback, so please leave a comment below if you have any. Over time, I’ll try to update this with improvements and reader suggestions.